Step I
Photogrammetry
Before stepping into the virtual world we needed to start in the physical world. Simon and I began by experimenting with different types of models and different methods of photographing these models. We discovered several things which would be usual to know for future photogrammetry work.
Less is more - more photos do NOT give you better results.
There is a balance between the amount of photos necessary to capture every decent angle, and too many photos. We found you can easily encumber the software by simply giving it too much data.
Shadows matter.
We thought an efficient way to capture the object would be to place it on a lazy suzanne and take pictures from a fixed camera position, then simply changing the camera height / angle. Unfortunately this resulted in bad data, and we realized if you are forced to capture with a single camera the object must remain fixed and the camera needs to movie.
Accuracy isn’t as important as you’d think.
When we shifted away from the fixed single point camera method of capture we were worried the lack of accuracy might affect the data (garbage in garbage out). Fortunately we were surprised to find that our loose ‘guesstimating’ of camera camera height and angle was more than adequate for the software to interpolate a usable mesh.
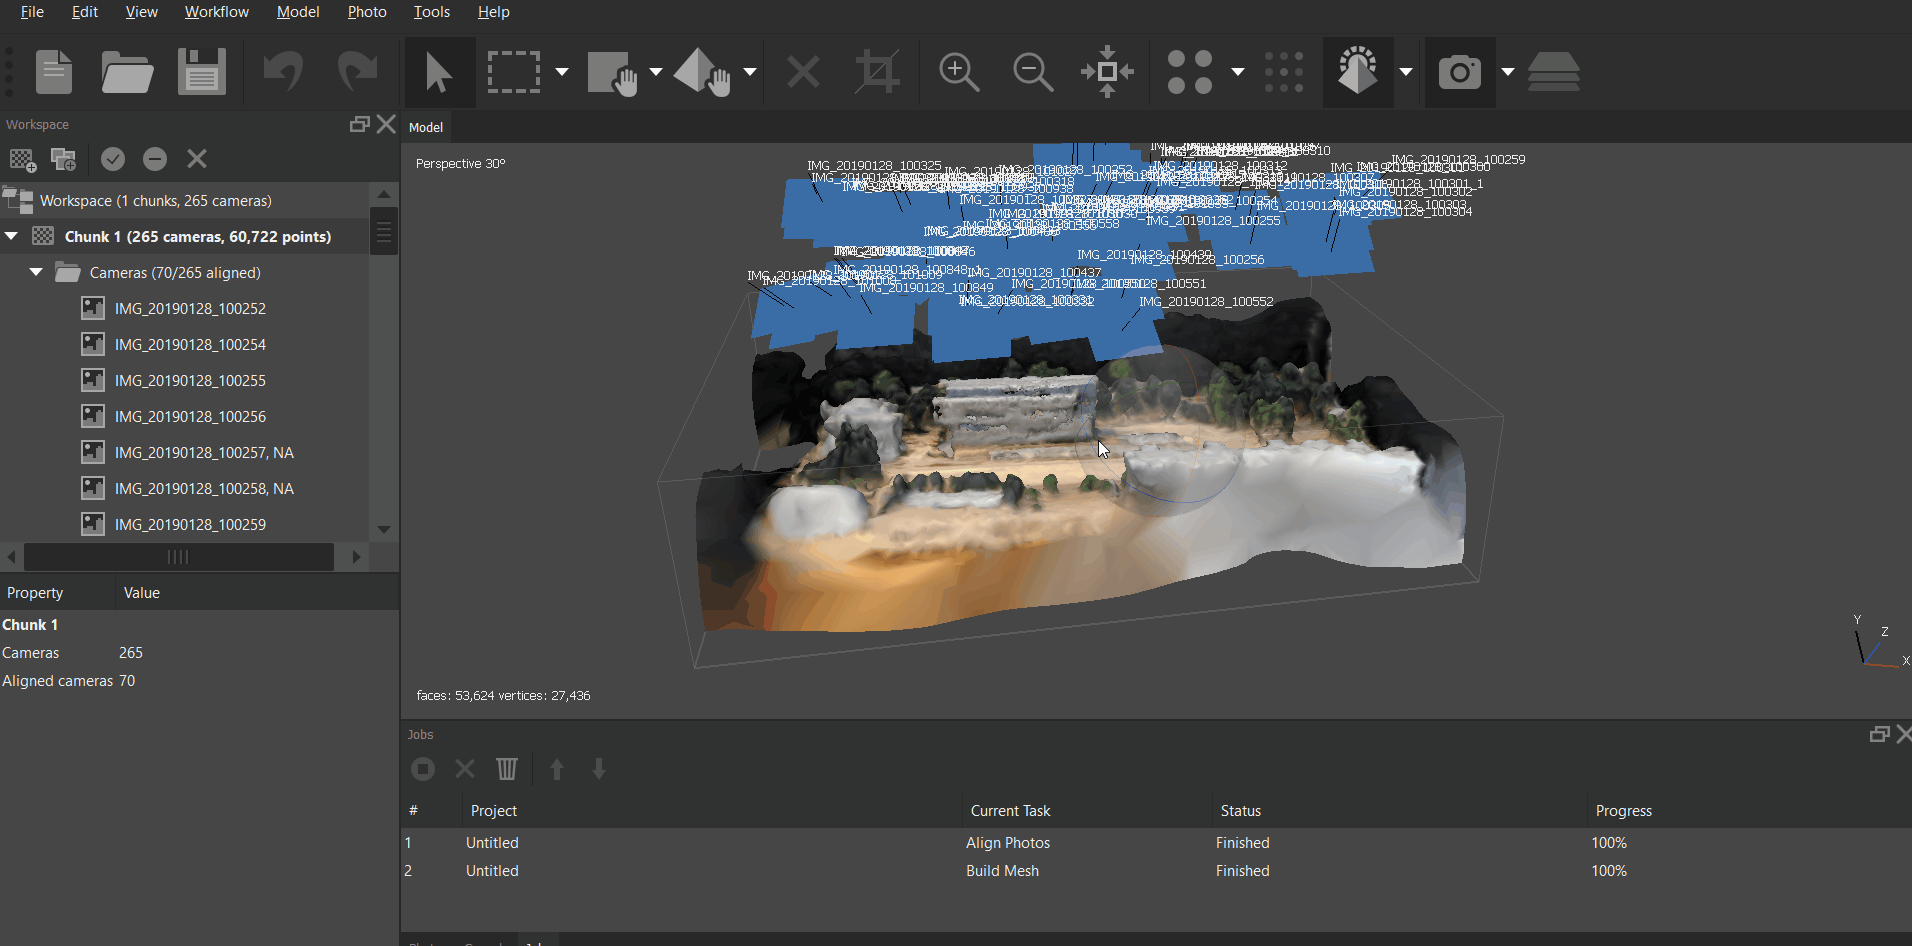
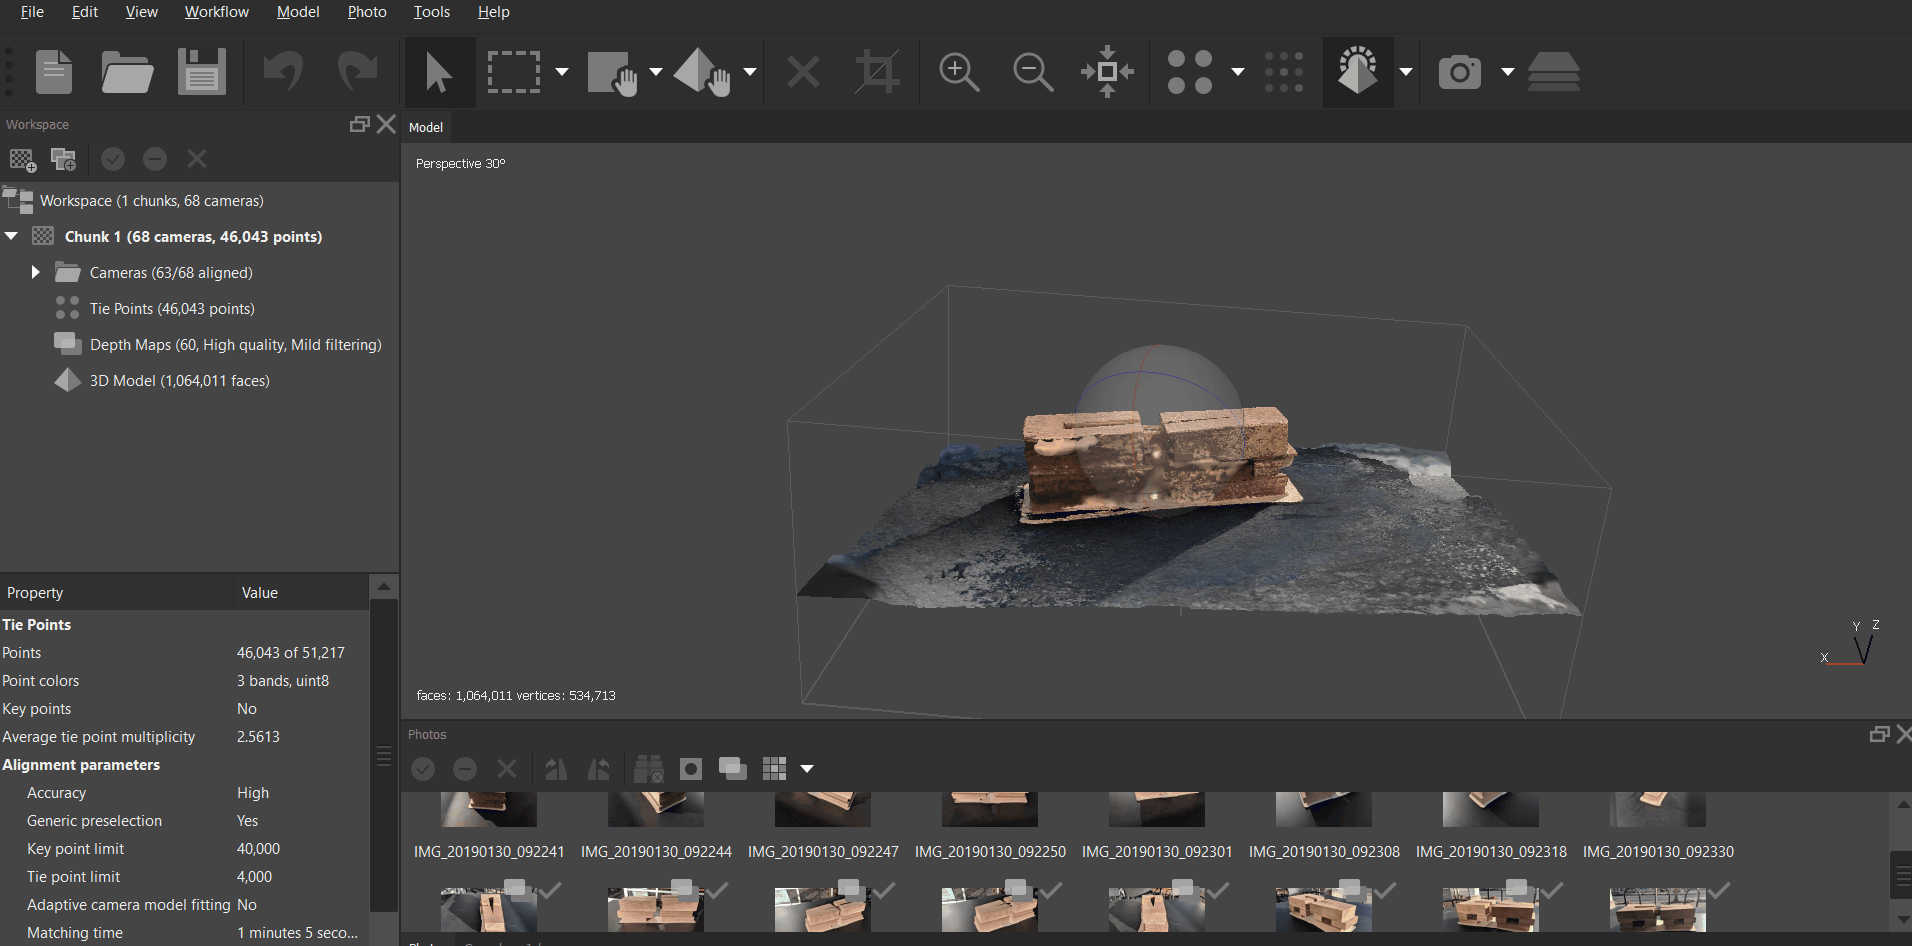
Meshes interpolated from point clouds require cleaning.
Despite our best efforts we discovered that inevitably even our best mesh results required manual touch ups. The polygon count for these models was also very high, so cleaning up rough edges, removing extra or unneeded surfaces is a good time to also optimize the mesh.
Step II
Which AR platform is best?
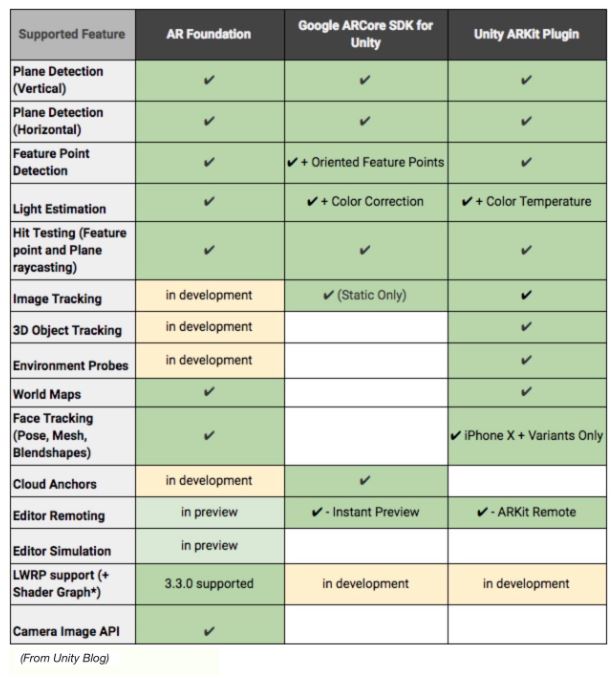
ARCore //
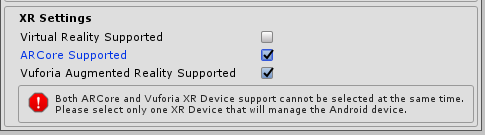
Simon and I both enjoy Android and decided early on we were going to work in Google’s ARCore platform. Although we were able to successfully deploy an augmented reality experience to the Android we quickly discovered that it lacked the capability to accomplish the ‘3D object recognition’ we were after.
When mapping digital information into the physical world the software needs to establish an anchor and recognize planes. Planes construct the illusion of a 3D object ‘sitting’ on a physical surface. Anchor points act as the origin from which the augmented reality propagates and prevents the virtual objects from ‘floating’. Our goal was to use our physical hand built model as a 3D anchor point for the augmented reality experience, overlaying the photogrammetry mesh onto the physical model. But ARCore does not have the capacity to do this, so we searched for alternative solutions.
Vuforia //
Vuforia is a less robust augmented reality platform but it provides some unique capabilities. It is excellent at recognizing images, using those images as an anchor for AR, and triggering an AR events. Unfortunately images make for a less than reliable anchor; the camera needs to actively see the image to continue the AR experience. As soon as the image leaves the frame the AR experience disappears and until it ‘finds’ the image again. This is because there is no spatial information embedded in the image, it’s simply a pattern.
The latest incubator related to AR used Vuforia but took advantage of its ability to see patterns (a rather clever and totally viable use), but the 3D printed object was a cube; vuforia allows for 6 images to be used as a ‘pattern database’ so even though the cube was three dimensional it was still technically a series of flat patterns. This also explains the slight glitchiness associated with using Vuforia on the cube.
We tried creating a similar database of our more complex physical model and although we were somewhat successful tracking was very inaccurate and unreliable so we decided we would prefer a true 3D object anchor over the image pattern recognition.
ARKit 2.0 //
3D objects are the most robust AR anchor because they are real geometry, they’re both a pattern and an object in space. This also provides a more immersive user experience because once the 3D anchor is set the device/camera are free to look around without losing track of the digital model.
Although ARCore is slated to have this feature included in future builds it is far behind Apple’s ARKit. Developing for Apple hosts a number of logistical constraints but ultimately we decided it was the best choice; it provides the 3D object scanning we need to then create a 3D object anchor. It also integrates well with Unity.
Step III
Scanning using ARKit
Once we decided ARKit was the best platform we had to find a way to scan our object to create the AR anchor. Initially we thought our Photogrammetry mesh could be used, but it’s just not that simple. But our photogrammetry mesh is still extremely important and we’ll address how we used it later.
Apple has provided a few different tools to create its new, proprietary, file type ‘.arobject’. A .arobject is not a mesh, it’s not a point cloud, it’s a “ar object”. This can be confusing since when you bring the .arobject into Unity it’s shown as a file type, but fortunately Apple has also provide a tool which allows developers to easily convert their .arobject in a AR anchor.
The aforementioned tools are a) a Unity scene deployable to an able device or b) an app deployed through Xcode. Initially we used the Unity scene, but we found it did not create very good data and thus created a pretty inaccurate anchor. The Xcode app [found here] created much better data and is what we used to create our anchor.
Step IV
Using the photogrammetry scan
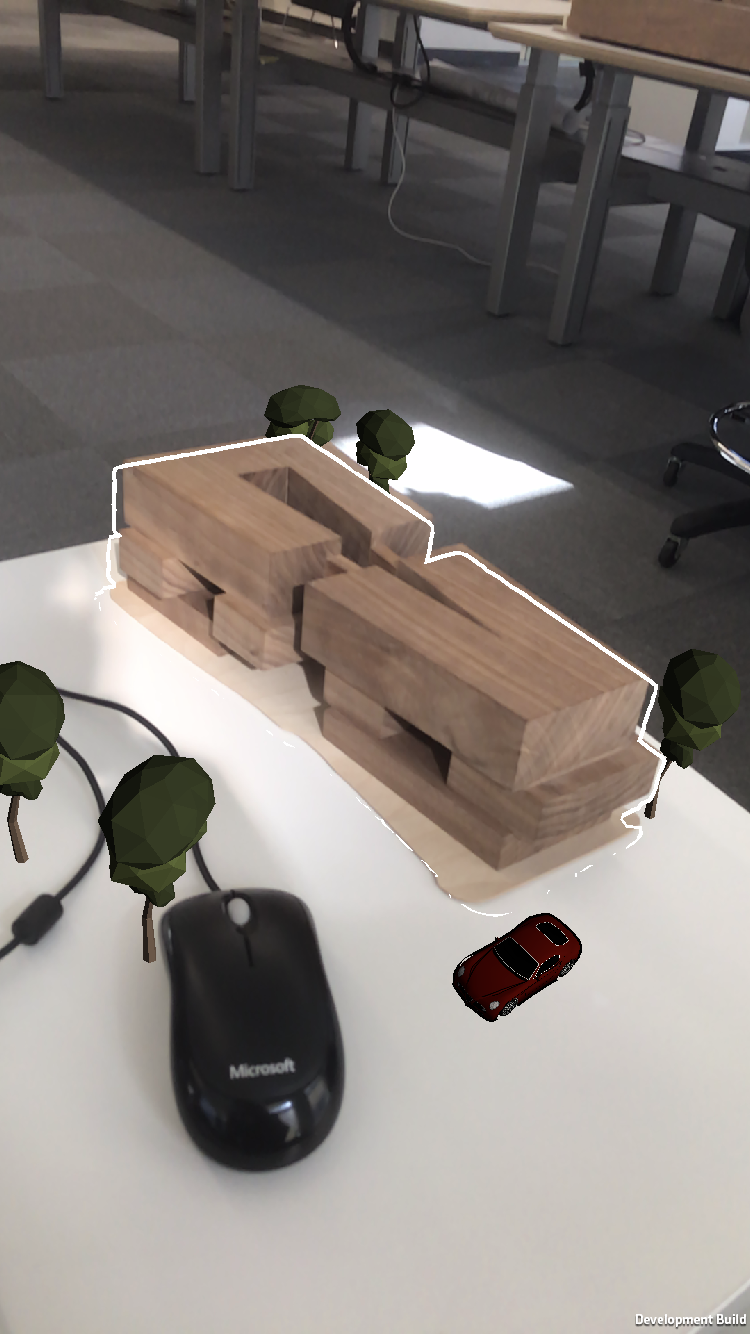
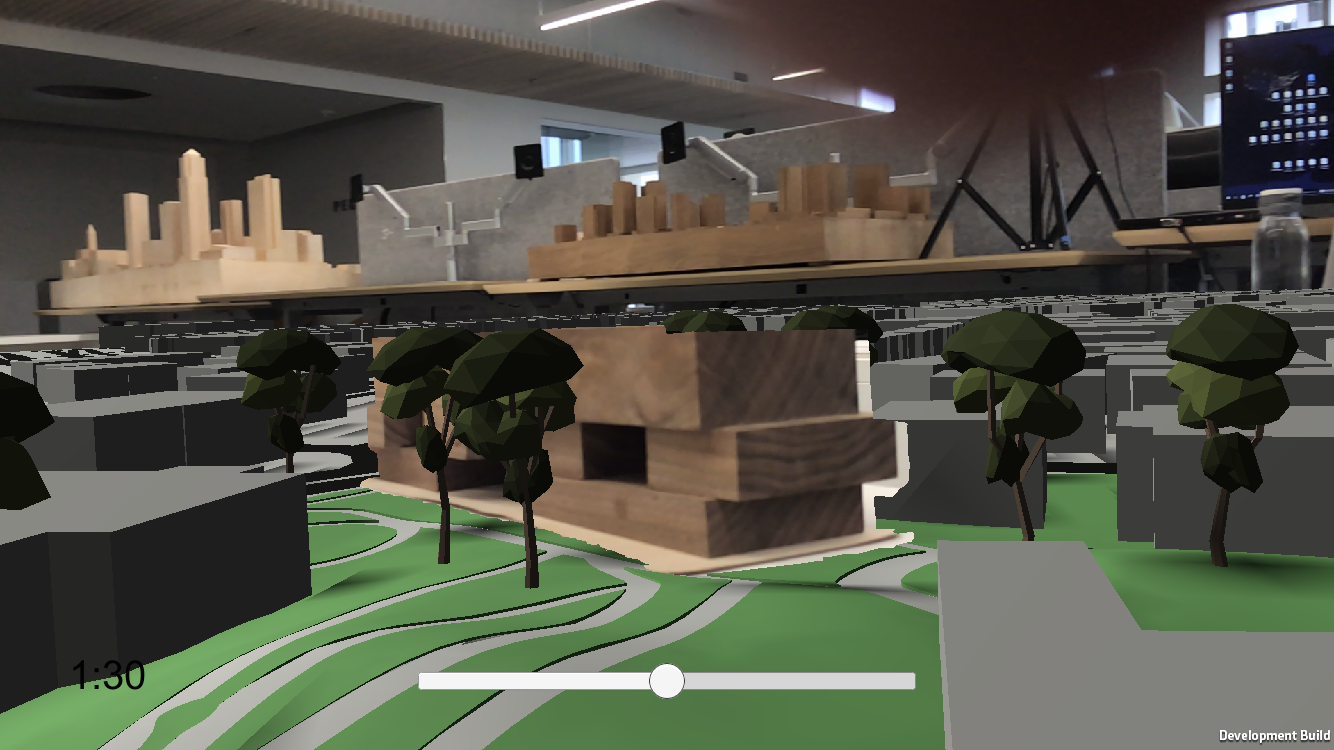
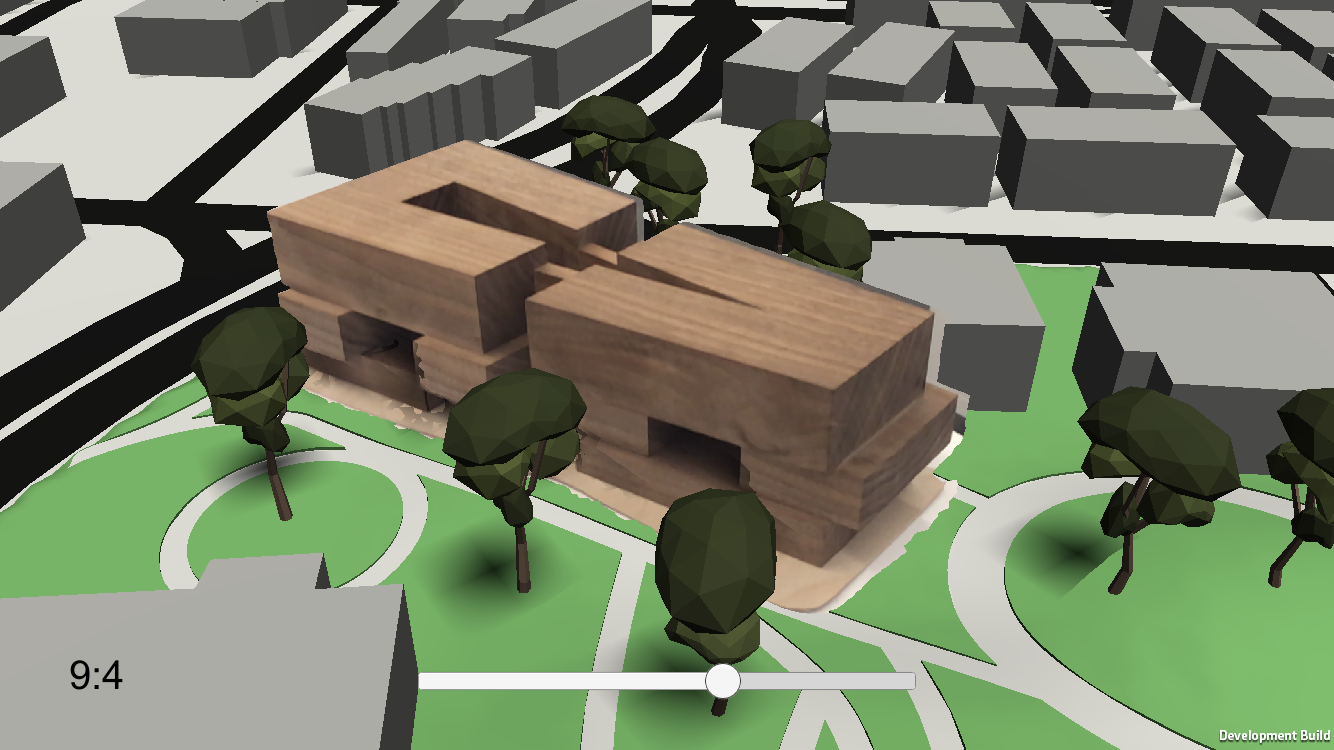
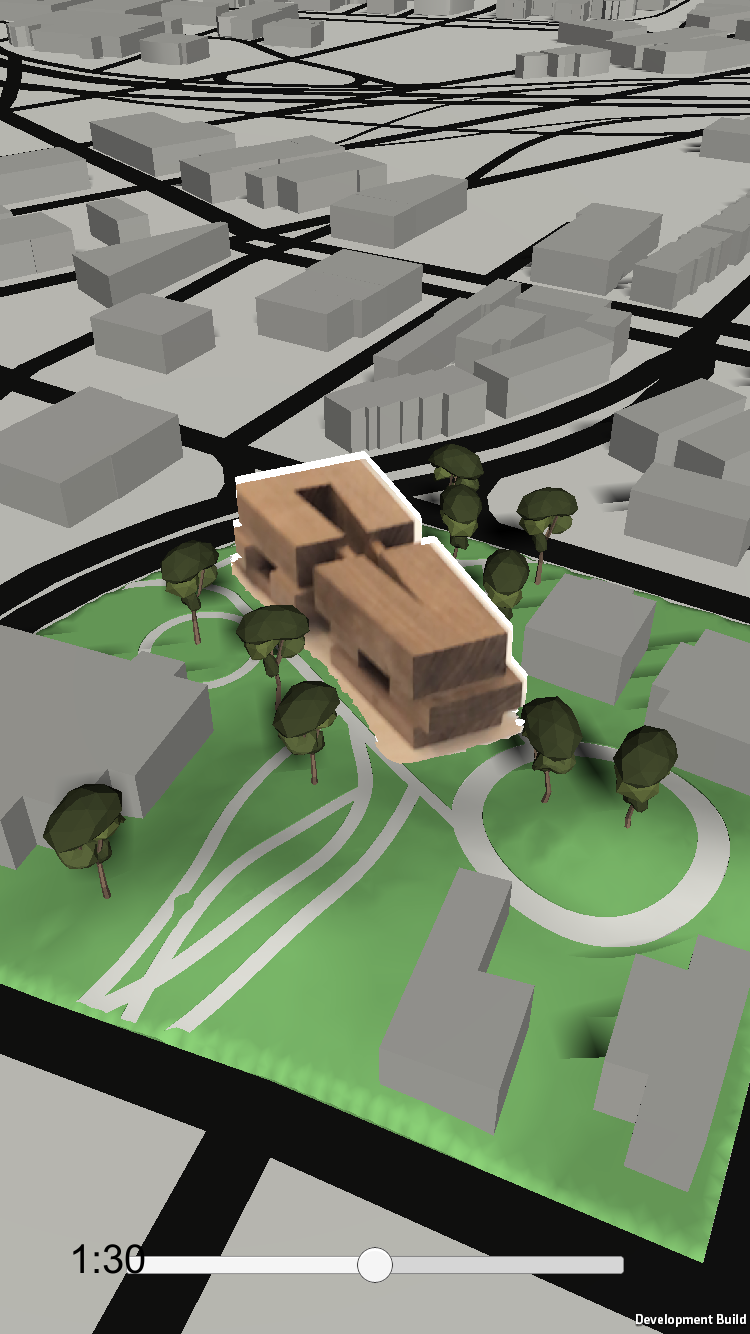
Now that we had a proper anchor based on a 3D object we could use our photogrammetry mesh in three ways, i) as a reference for our digital entourage, ii) to occlusion cull said digital entourage, iii) as a faint reference to assist with the alignment to the physical model.
Step 1: Cleaning the model //
Our first step was to clean the mesh produced through the interpolation process. We chose to do this in Blender but any 3D software which works with meshes can be used. We pruned the mesh to only include surfaces which best matched the hand built physical model. We also reoriented the object to X, Y, Z, coordinates and optimized the model to have a lower polygon count. Then we exported the mesh as a .fbx and brought it into Unity.
Step 2: Developing the prefab //
Converting the mesh into a usable prefab was not difficult, but achieving the effects we wanted took a lot of trial and error. First, we converted the mesh into prefab. Then we added materials, shaders, and enabled occlusion culling for VR. The white outline and transparency were the result of trying and adjust various shader and shader settings. Finally we added entourage to the prefab.
Step 3: Adding animation and shadows
We added a basic pathing tool, place a car or person in the prefab and add the Patrol script. We then create an empty gameobject called PathHolder or similar and drag that empty gameobject into the path holder variable of the Patrol script. Then, by creating empty gameobjects named waypoint as children of the PathHolder the Patrol script will draw them as Sphere gizmos and draw a path from waypoint to waypoint. Upon identifying the target object the scene will render the persons or cars traveling from waypoint to waypoint (but won't render any of the gizmos, which are only rendered in the Unity editor).
We’ve discussed integrating the pathing script more into unity by making it an editor script, so that it could be created and manipulated with buttons instead of dragging and dropping waypoints, and we definitely want to do that in the future, but that was beyond the scope of this incubator and so left out.
Step V
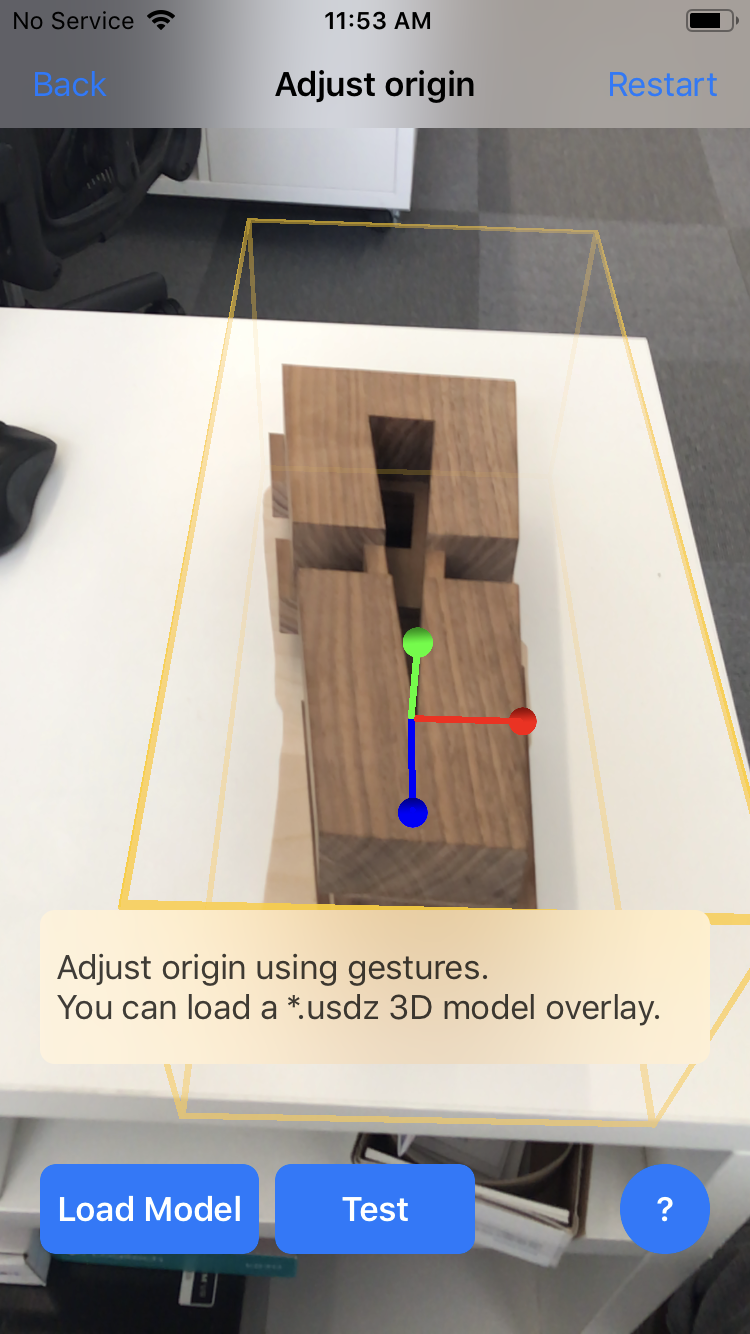
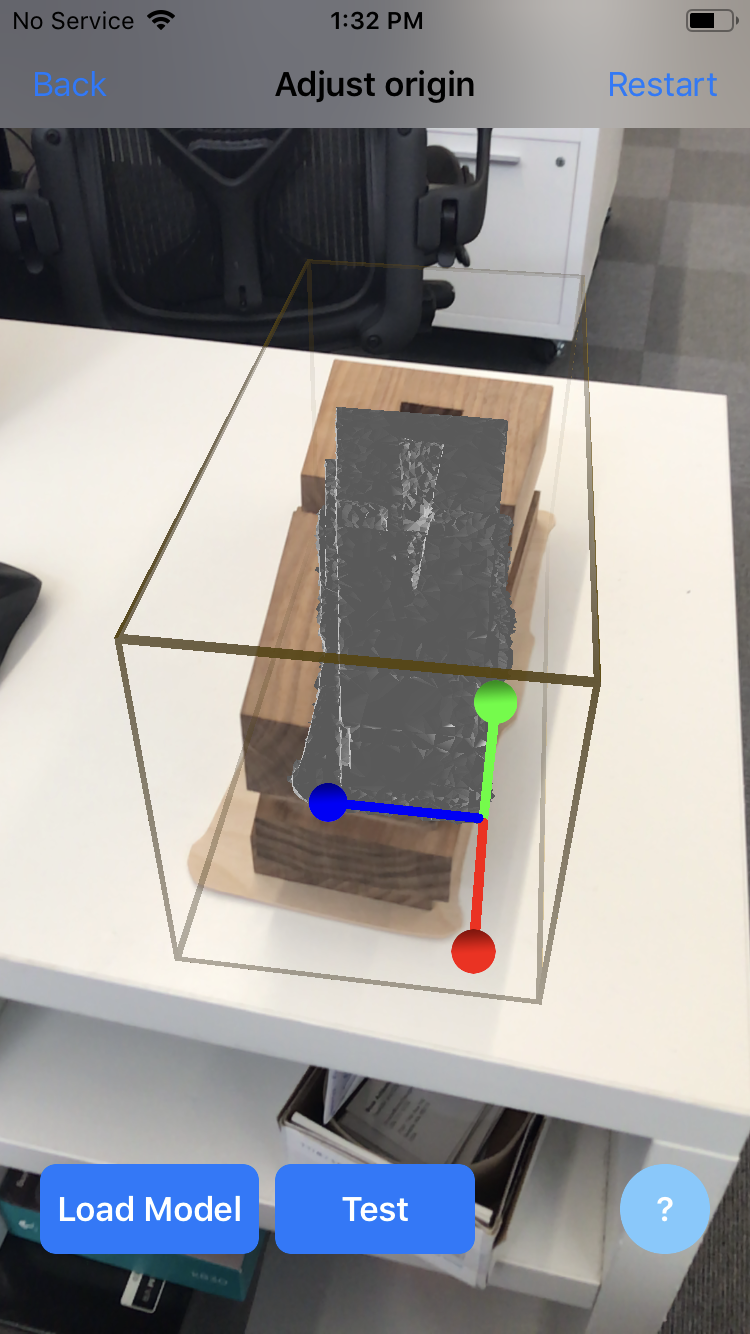
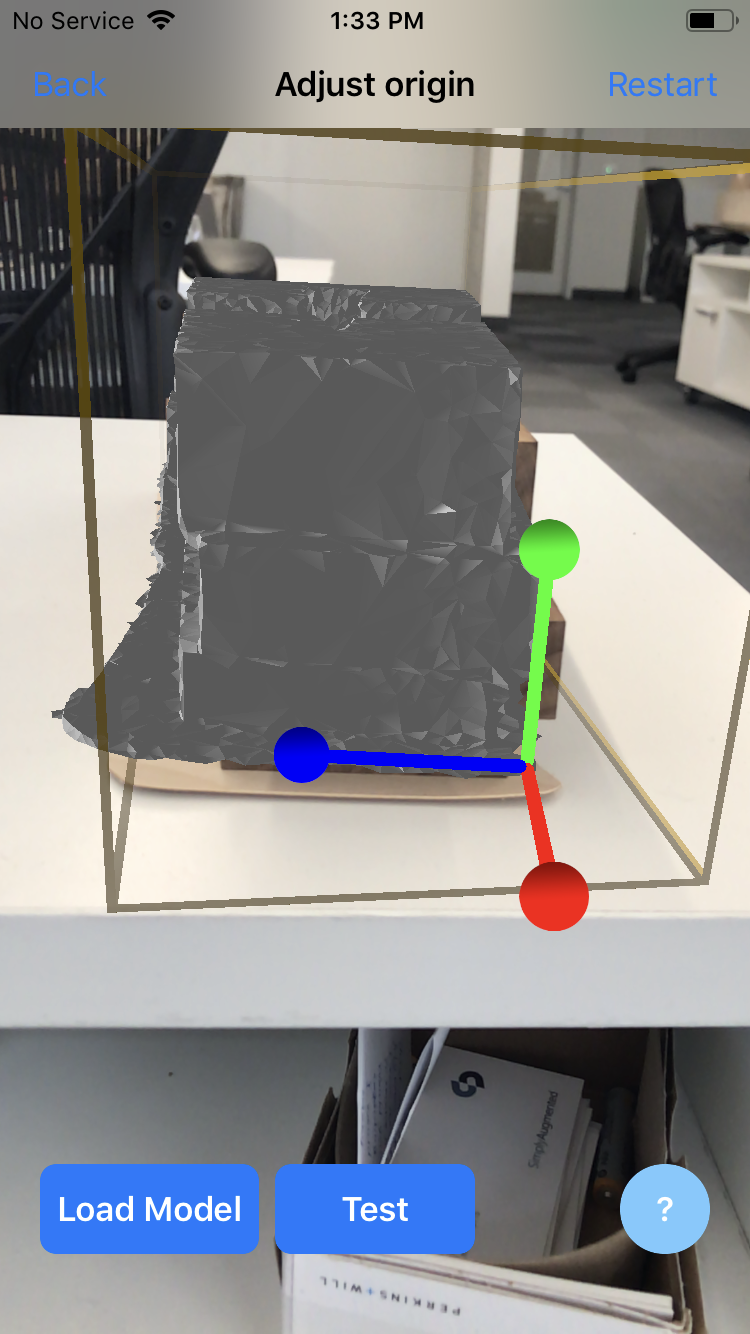
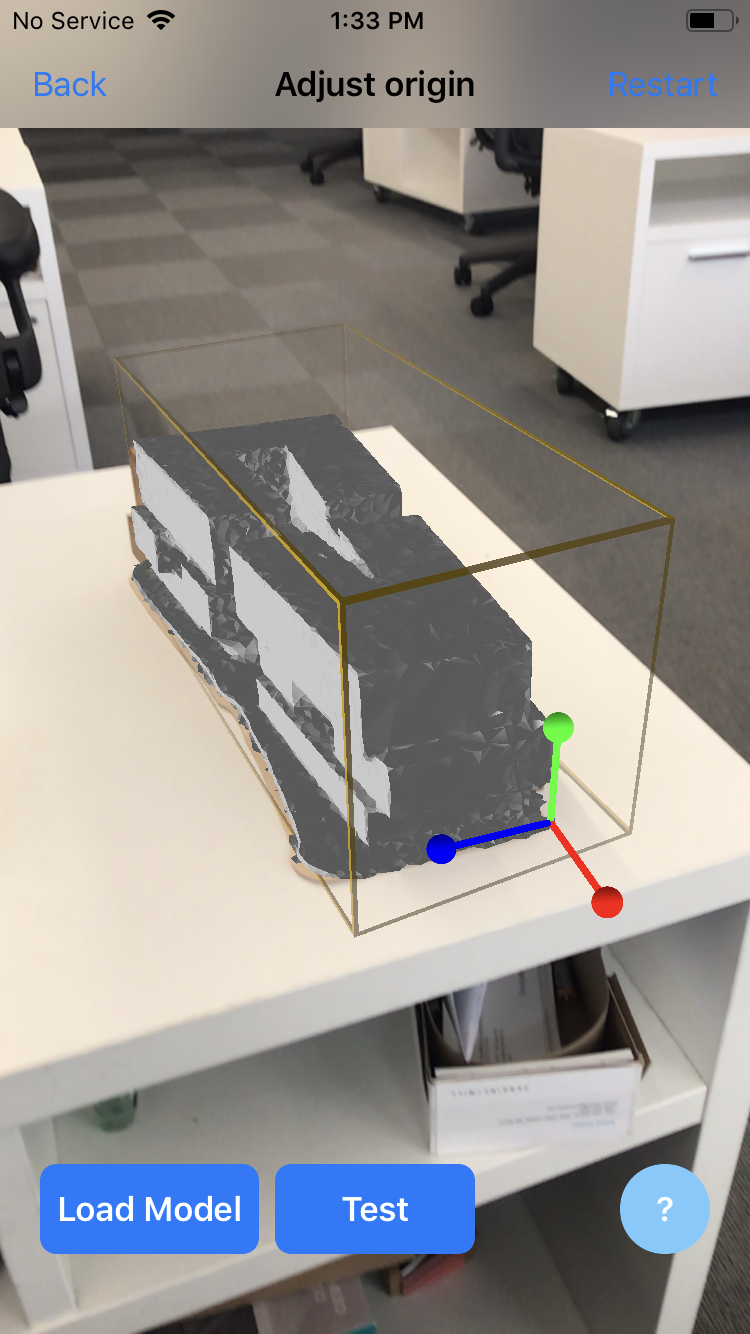
Aligning the prefab with the 3D Anchor
After our scene was fully developed, and we had a proper 3D anchor we needed to aligned our scene / entourage with the anchor. Initially we operated under the assumption that the ‘arobject’ would center it’s volume about the scene’s origin (0,0,0). This turned out not to be true and in fact the only way we found to align the two objects was to build out the full Unity scene, see how the scene entourage and arobject were aligning, adjust the arobject’s location, rebuild the scene again and so on. The final result is less than perfect but this is due to the nature of the ‘arobject’. The arobject class has now way to preview its location prior to a full build. As can be see in several of the screenshots the alignment is very believable and the small imperfections hardly perceivable, but we hope Apple or ARCore will consider adding a geometry to their arobject classes to help with these alignment issues.
Final Notes
Ultimately our incubator research was successful even though our final app is less than complete. We discovered a workflow which allows users to scan a physical model (under a certain set of parameters), use that physical model as an anchor to have virtual content instantiate and occlude, and modify the virtual AR content to the users specifications. We hypothesized our app eventually being integrated into VX, meaning a single portal for both VR and AR experiences. Two vastly different modes of rendering information both with the intent to provide clients with a vision with what is possible.
We hope future research regarding AR will review our process, ask us questions, and ultimately build on what has been done here. VR and AR are still extremely fledgling but it will not be long before they take flight and become industry standard. Perkins+Will is ahead of the curve, but will only remain in the position if innovators show interest and AR / VR research continues.
Thank you Perkins+Will for the opportunity to explore a topic we are passionate about. Simon and I both enjoyed and appreciated the time and money given and hope our work stirs curiosity!
LINK TO GITHUB REPOSITORY
https://github.com/chanceh/AR-Incubator